Short Film: Pre-Production
- apower9986
- Dec 15, 2023
- 6 min read
I chose to complete this film project by myself, therefore I took on the role of Director, Producer, and Camera operator. I completed the pre-production and decided that some elements of pre-production would not have worked or helped in this project due to it being a found-footage-style horror film. These included the storyboard and shot lists as most of the filming in the project was improvised to give it that vlogger and home video style.
Script


The script included lots of room for improvisation to make it feel as real as possible, I wanted to include the slight stutters or pauses that a normal person would make when talking to capture the audience and make them feel like this hiker could be one of them, not a smooth-talking fantasy character. This did prove hard though as I now think that the film would have run more smoothly if I had written a fully detailed script. I have learnt this could be an issue during filming and I will be writing a full and detailed script in all my future projects to prevent this.
Colour Palette

Above is the colour palette and the image I used to create it. It consists of earthy browns, greens, and light blues for the sky. The colour palette accurately shows a forest in the daytime, with the light blues and greens representing the safety of nature and the dark browns and blacks juxtaposing the light and giving a sense of danger. I also used a picture of the planned actual filming location to create this palette, it made it the most accurate to the actual final edit.
Resource list

To the left is my resource list and it includes the different types of equipment I used to record my film and record Foley sounds. Because my film is in the found footage style, I only used a small amount of basic equipment to film. This gave the film a "home video" feel to it and increased its believability of being a real video recorded by a real hiker.
The Cannon Legria can be used as a handheld camera or be mounted onto a tripod. For this reason, I chose it because it could be easily set up by myself

on location. It is the number one choice for vlogging and filming in real life and therefore is easy to record clear imagery whilst holding it like a camcorder (Which is what the hiker is doing in the film.)
The camera top microphone, or RODE Shotgun mic, is slotted on top of the camera and plugged into the side to record audio. It does not pick up the cleanest audio but this adds to the vibe of a home video made by the hiker who would not have access to high-quality equipment. The

microphone is a cardioid mic which means that the area in front of the microphone is the most sensitive, the sides are less sensitive and the rear is ignored. This is good for my film as most of the shots will be me pointing the camera to my face in extreme close-ups so I will be able to accurately record my voice whilst also recording the sounds of the forest, eg. birds chirping, trees creaking etc.
The portable camera light is also slotted on top of the camera with the microphone and provides a light facing the front of the camera. I originally wanted to use this piece of equipment to create some ambient lighting during the final scenes where it is darker than the rest of the film. I, unfortunately, did not receive this equipment when I came to record my film but I discovered that the final scenes looked more ominous and scary with minimal lighting so I adapted and no longer needed the portable camera light.
The tripod is used to prop up the camera and set it to any angle while filming. You can set up the tripod to your desire and then start recording and it will stay in the exact place and angle you set. I used this piece of equipment to get a wide-angle shot of the forest when I was setting up the tent or talking to the camera in my film. This proved very helpful as I could set it up and leave it. Vloggers and YouTubers also use this equipment to create their videos so it is accurate to use it in my film as I am trying to replicate a YouTube video.
Production Schedule
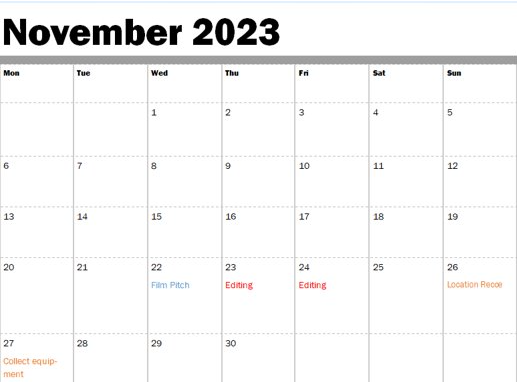
This is the production schedule I made up for my film project. On the 22nd, I presented my film pitch to the class and expressed my plans for the film. The two days after that was used for editing because the first couple of clips in my film could be made in college without having to film. On the 26th I was supposed to conduct a location recce but I was not able to due to weather and distance restraints. The distance of the original filming location became a big problem and I eventually decided to film in a similar area closer to home. On the 27th I collected my equipment but did not receive the correct camera as the priority with the legrias was given to the older years, due to this I began filming on the 28th but the replacement camera I was given did not record audio through the RODE camera top mic so I managed to swap the inefficient camera with a legria the next day.

On the 1st of December, I continued to edit and had planned to film on the following Sunday but yet again there was a problem with distance and this is when I decided to change the filming location. The 6th was supposed to be the day of screening but due to almost all of the students having problems with the equipment, it was cancelled and we just had the deadline of the 15th. I continued to edit the clips with no audio and I received a shotgun microphone with a boom pole on the 7th to record some foley sounds and also use these to fix the soundless clips. I went out and filmed on the 10th and got half of the film recorded. It was then editing up until the 12th when I filmed a few more final bits to bring the story together. I then edited up until the 14th when I uploaded my final edit.
Shot list and Storyboard (test shots/photographic)
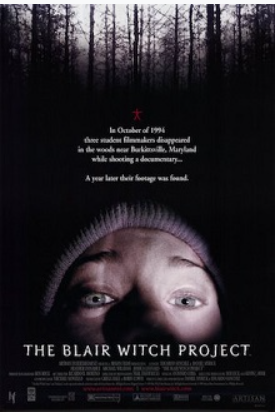
The theme of my film project is found footage and therefore I did not feel the need to create a shot list and storyboard as I planned to improvise the camera shots used. I know that another found footage movie, Blair Witch (1999), also did not have an official storyboard or shot list. I had memorised the different camera angles I wanted to use and the different compositions I wanted the shots to show so I still took the time to pre-plan my improvisation instead of just hitting record and going. My future projects will all have a storyboard and shot list as these are essential for creating the perfect shots most accurate to the script.
Location recce and Risk assessment
I swapped the original filming location to the New Forest and Stanley Park, these locations are extremely similar to the original location while being two hours closer than the original location. I was also able to film in these different locations and portray them in the film as just one location. These locations are deep forests with multiple points of interest and artificial and non-artificial structures. The New Forest also contains wild ponies and other forest wildlife. The size and their rich colours and nature will bring a false sense of security and the feeling of being lost.

Due to the autumn/winter weather, loads of muddy areas and wet patches increased the risk of slipping and falling. Fortunately, the costume included big waterproof boots and waterproof trousers so I didn't get covered or fall.
During most of the recording, I was alone so I did not have to worry about others getting injured. The parts that did require others to be there were filmed in clear areas and the risks were pointed out before the start of filming to prevent injury or equipment damage.

Production Diary

Here are a few photos of the behind-the-scenes of my film, in the middle, you can see me holding a boom microphone to my friend as I record audio for the Skinwalker's screams and shouts. We recorded some screams up close to get the effect of the creature being right behind the protagonist, and some from far away to create an echo and the feeling of it being far away.
On the right you can see me composing some music that can be heard at the film's beginning. I created a small jingle for when you see the UK crest to make the opening scene look more official. I used my previous knowledge of music from secondary school GCSE to make this.
On the left, you can see me filming on set. I wanted the film to have a YouTube vlog style so it included many POV shots and tripod setups. This brought the feeling of isolation and being lost as it included lots of extreme close-ups and POVs.


Comments